How to set up a Linux VM (Windows)
In this guide we will set up a Linux Virtual Machine (For Windows)
How to set up your first Linux VM (For Windows)
This guide will assume that you know nothing on the topic and aim to establish a foundational level of understanding when it comes to setting up your first Linux VM.
We will discuss:
- Prerequisites
- What is a VM
- What virtualisation technologies to use and why.
- Where to download VMware
- Installing VMware
- What Linux distro did we pick for this guide and why.
- Where to download Ubuntu Desktop 26.04.1
- Configure the VM
Prerequisites:
- VMware
- Ubuntu Desktop 26.04.1 Image
1. What is a Virtual Machine?
There will be another article on this topic, so we will keep this section relatively short.
A Virtual Machine (VM) is a computer simulated in software. It will allow you to effectively have a separate machine inside your machine that can use some of its resources, such as processor, graphics card, memory, storage, and network connectivity, without having to buy a new PC. This can be very useful if you just need a different environment or system for a specific task, or want to learn about different technologies without necessarily having to buy a machine for each.
You can read more about virtual machines here
2. What virtualisation technology we are going to use for this guide.
During this guide we will be using VMware. The reason for this is simple. Microsoft Hyper-V Is terrible.
No but in all seriousness, I got stuck for a long time using Hyper-V and the issue I was facing is that I could not for the life of me get Hyper-V to support native 1440p resolution on my desktop. I wanted a VM that uses my native resolution from my pc, so that it would be a matter of just minimizing or maximising the window to swap between "desktop environments" so that I could continue whatever I was working on with minimal disruption.
Besides, Hyper-V requires windows pro, education or Enterprise licence, Windows Home is not supported. VMware doesn't have this requirement. (meanwhile there are some simple ways to fix the windows pro requirement, we will not handle this in this guide) You could follow this guide using Hyper-V just fine if you really want. But one word of advice: save yourself the trouble.
So for simplicity, I will be using VMware.
3. Where to download VMware
Always use the official website. There are a lot of re-distributions out there and you don't know whether these are safe to use. So the safest bet is to always use the official website for any software you are looking for.
One caveat with VMware is that you will need to register an account with BROADCOM to download it. (Hyper-V doesn't have this requirement)
Official website: https://www.vmware.com/products/desktop-hypervisor/workstation-and-fusion
First make an account, and press the download button, this will take you to a login page which lands you at: https://support.broadcom.com/
From there either go to "downloads" and click "free downloads":
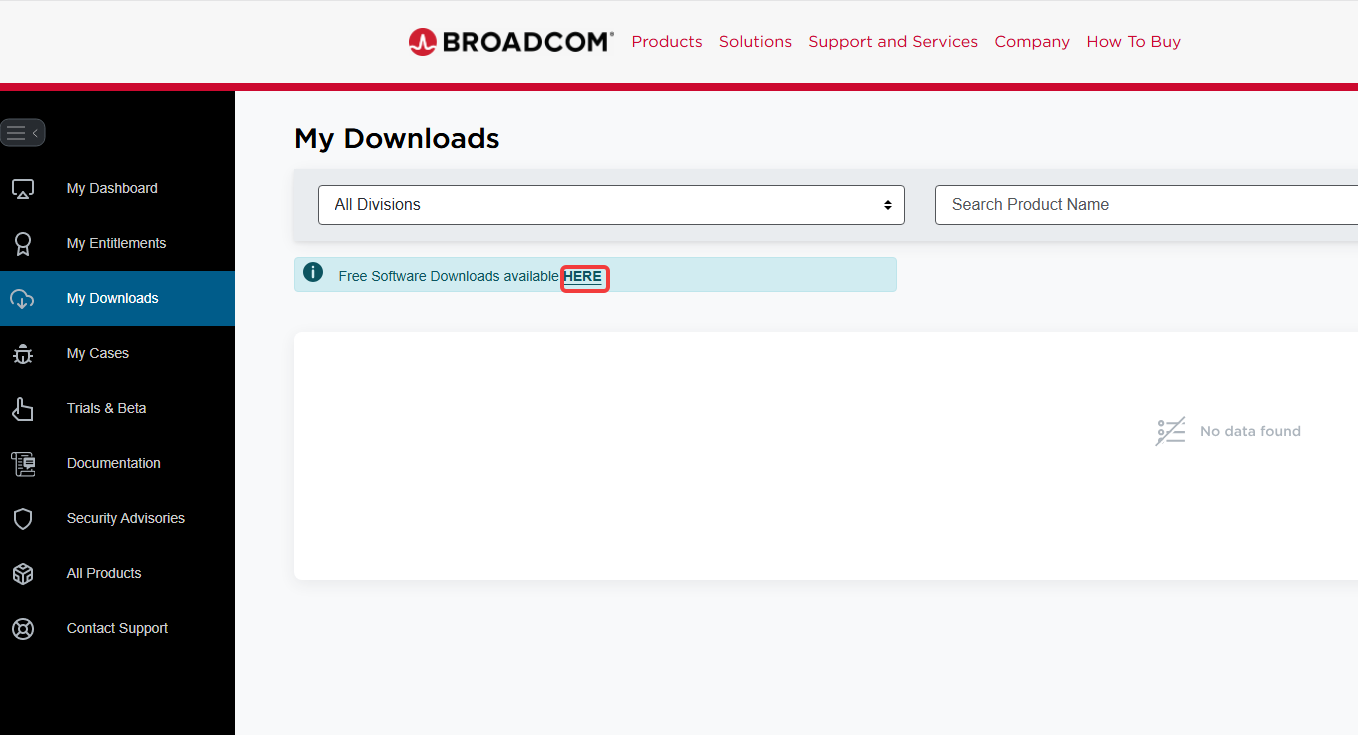
and look up "VMware Workstation Pro" which is currently on first page on bottom left:
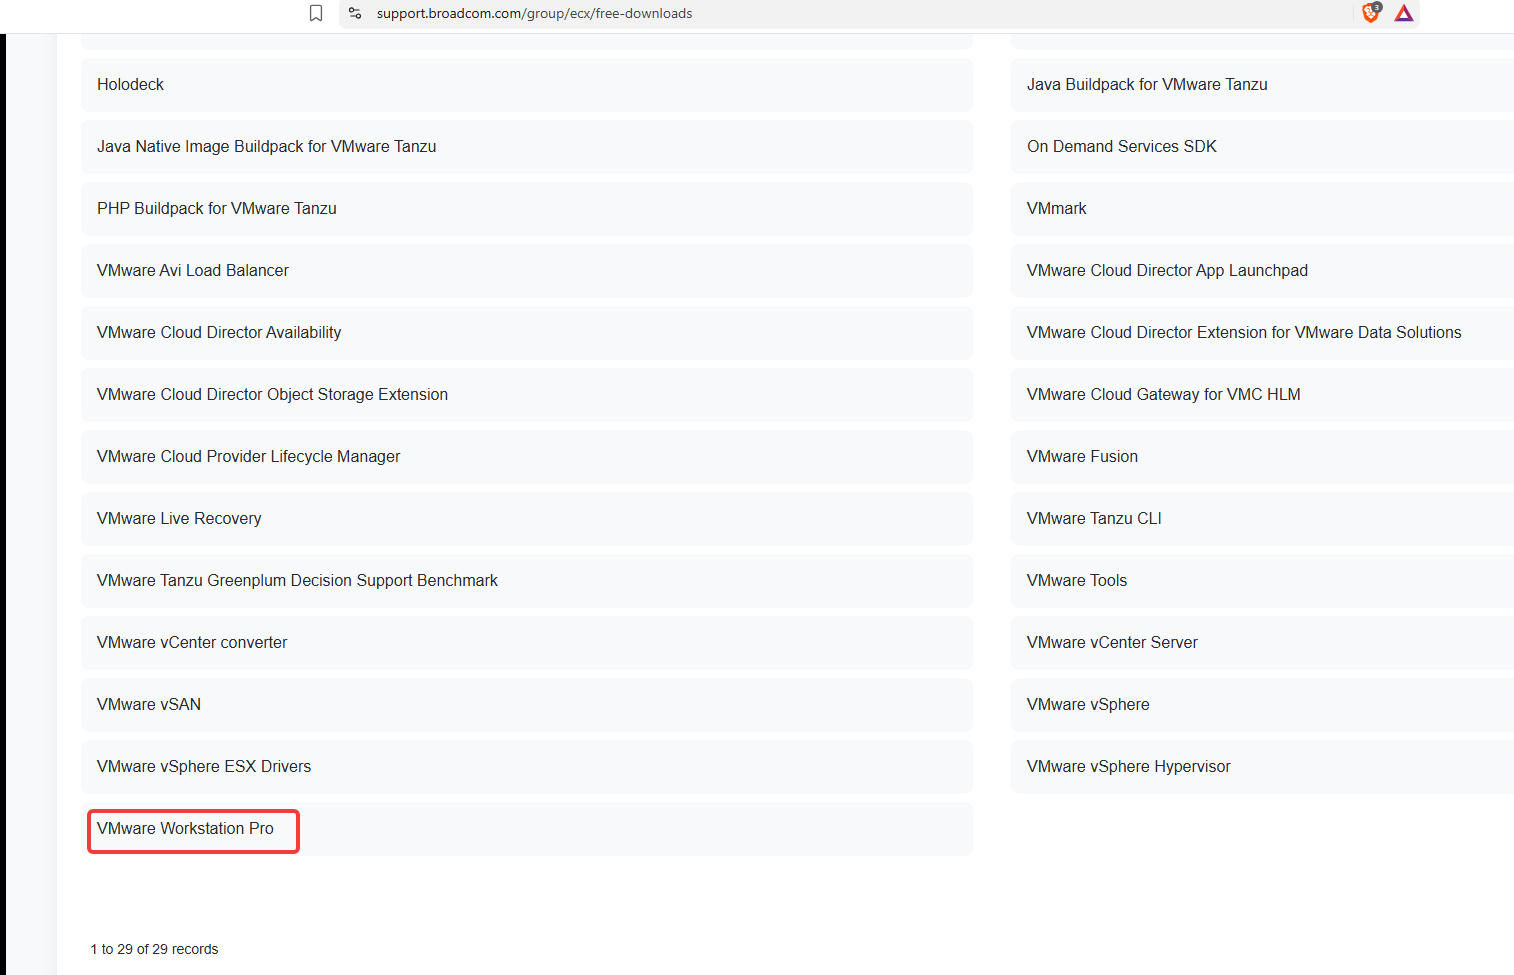
Or use click this link: https://support.broadcom.com/group/ecx/productdownloads?subfamily=VMware%20Workstation%20Pro&freeDownloads=true
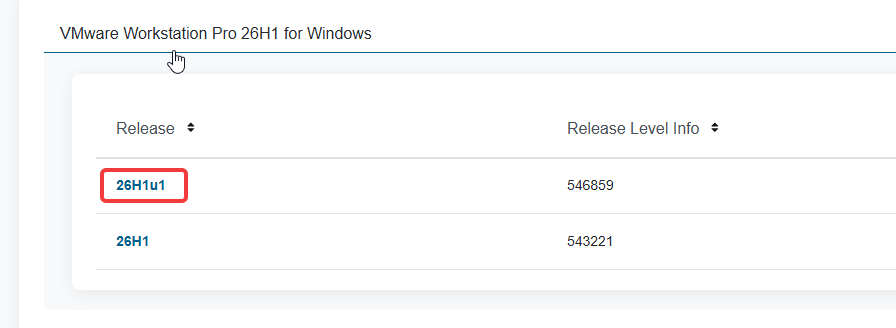
Then select which version is supported by your device. If you are on latest windows select 26H1.

Then 26H1u1:
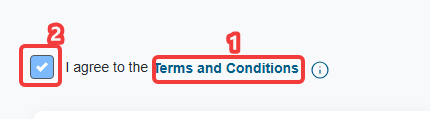
If the download button and "I agree" is blocked out, its because you have to actually open the Terms and Condition and then tick the "I agree" box after.
4. Installing VMware
Just "next" your way through, no need to change anything unless you want to untick the marketing question on final screen.
5. What Linux distro and why.
For this guide we will be going with Ubuntu Desktop 26.04.1. The reason for this is because it is beginner friendly and comes with most of the tools you need for general computing already installed, such as a graphical user interface(GUI), word processors, spreadsheets and other tools. Additionally the image we are selecting is the LTS release (Long Term Support) which provides 5 years of standard security maintenance, making it a great starter place.
But by no means the "best" distro for all use cases and there are many different flavours of Linux out there that may better fulfil different needs.
6. Where to download a Ubuntu Desktop 26.04.1 LTS
I recommend to download it from Ubuntu's official release page: https://ubuntu.com/download/desktop Look for: Ubuntu Desktop 26.04.1 LTS and select (64-bit Intel/AMD)
7. Configure the VM
- When you open VMware click the big "create new virtual machine" button.
- select "typical (Recommended)" then go next.
- On the "guest operating system installation" screen. Change the tickbox from "installer disc" to "installer disc image file (ISO) and select "browse" and navigate to your downloaded linux ISO. Note that you can select other distro's. However the installation may be different then this guide.
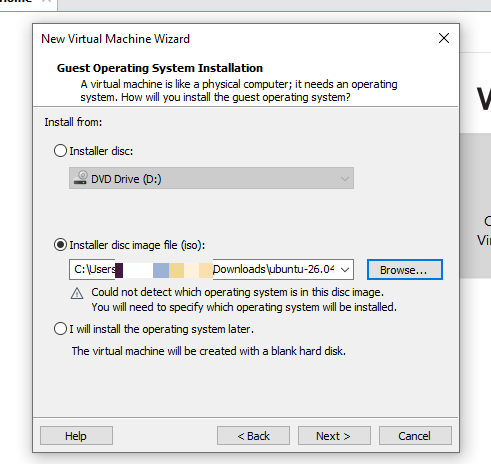
- On "select a Guest Operating System" Select "Linux" and on on version go "Ubuntu 64-bit"
- Select a name for the machine and go next
- Allocate disk space. I will set 40 for mine. Note that you need to retain at least enough for the Ubuntu installation + some then go next
- You can chose to grab the summary and save it in a notepad for inventory or you can just click Finish.
- Click "power on this virtual machine"
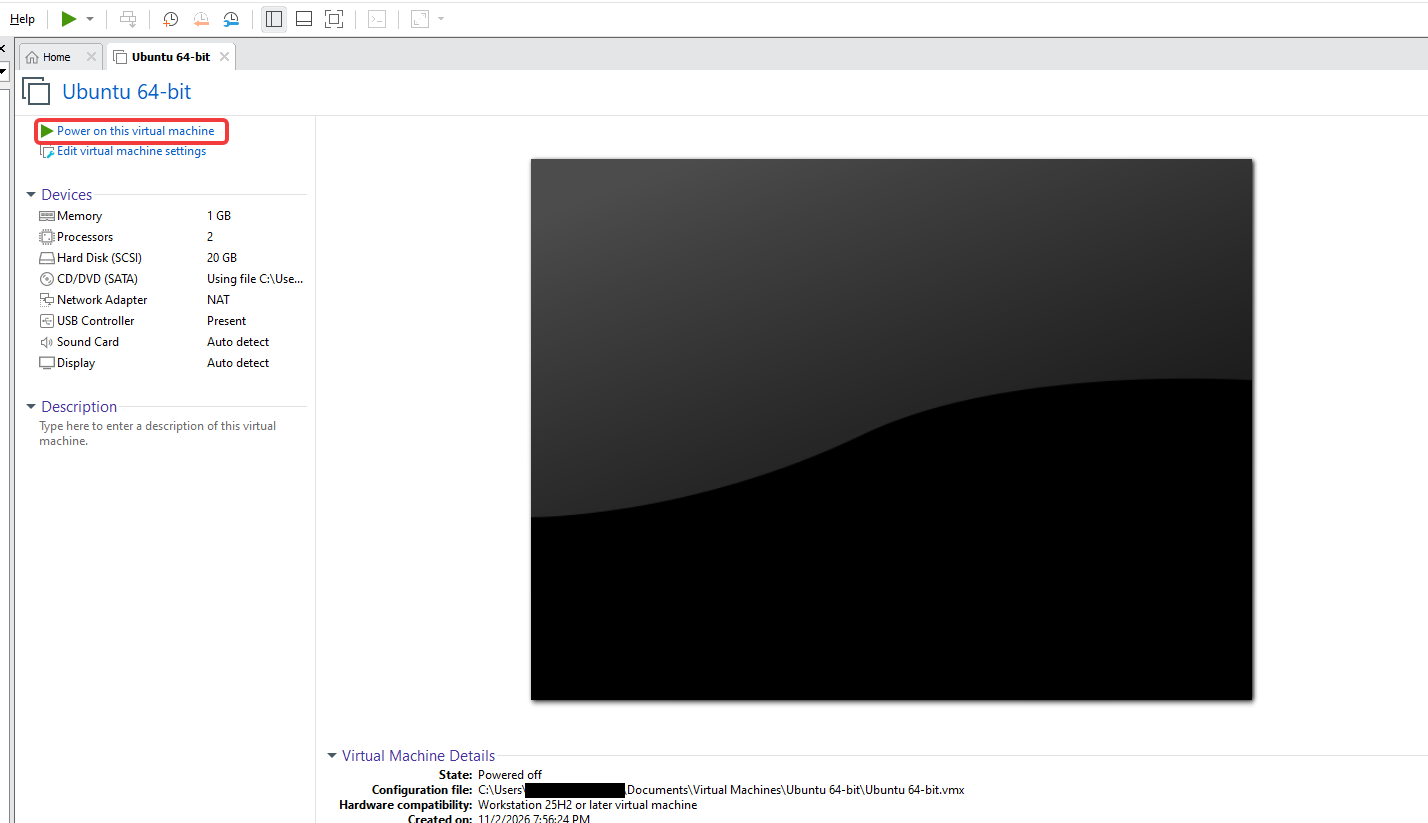
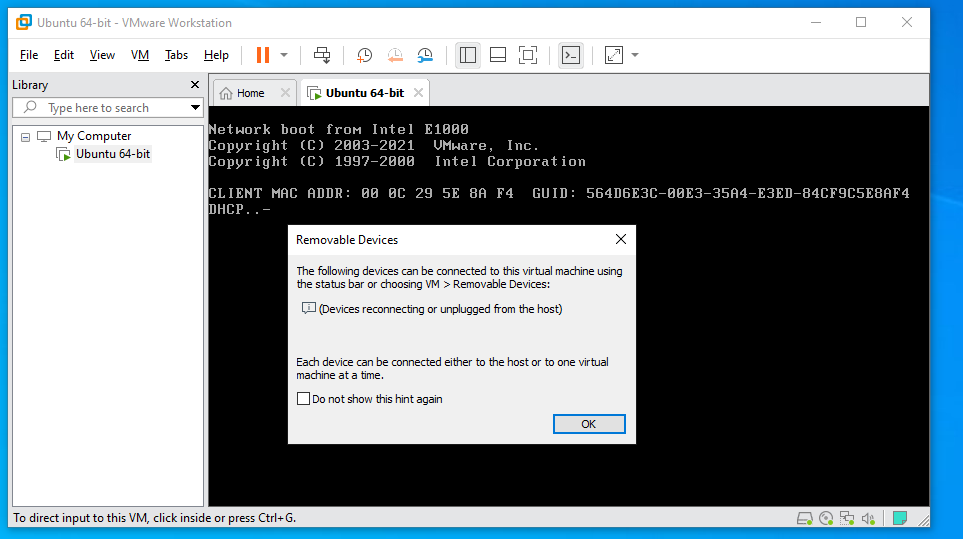
- If you get the below box, Just tick "do not show again" and press "ok" It is just general information about removable devices.
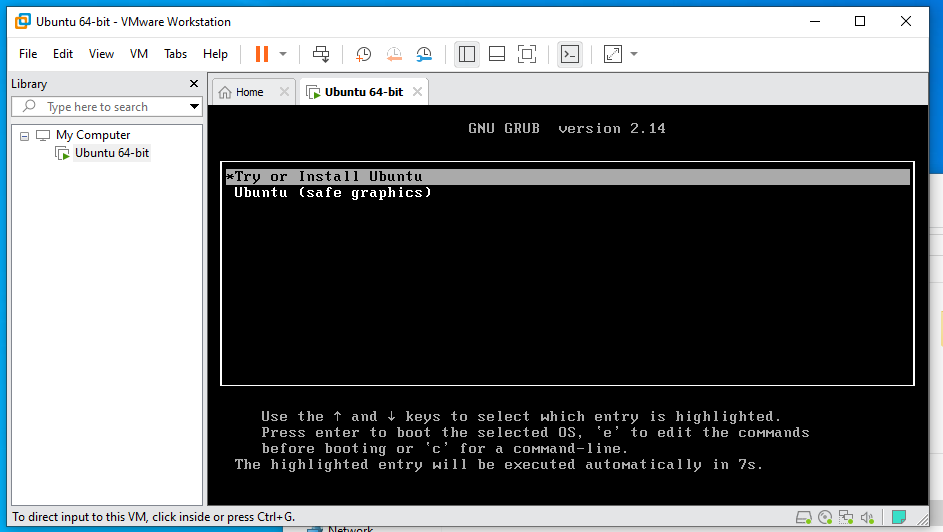
- On below screen, select "try or Install ubuntu" If you leave it too long it will just select that and move on by itself so if it just started doing stuff, thats why. Nothing to worry about:
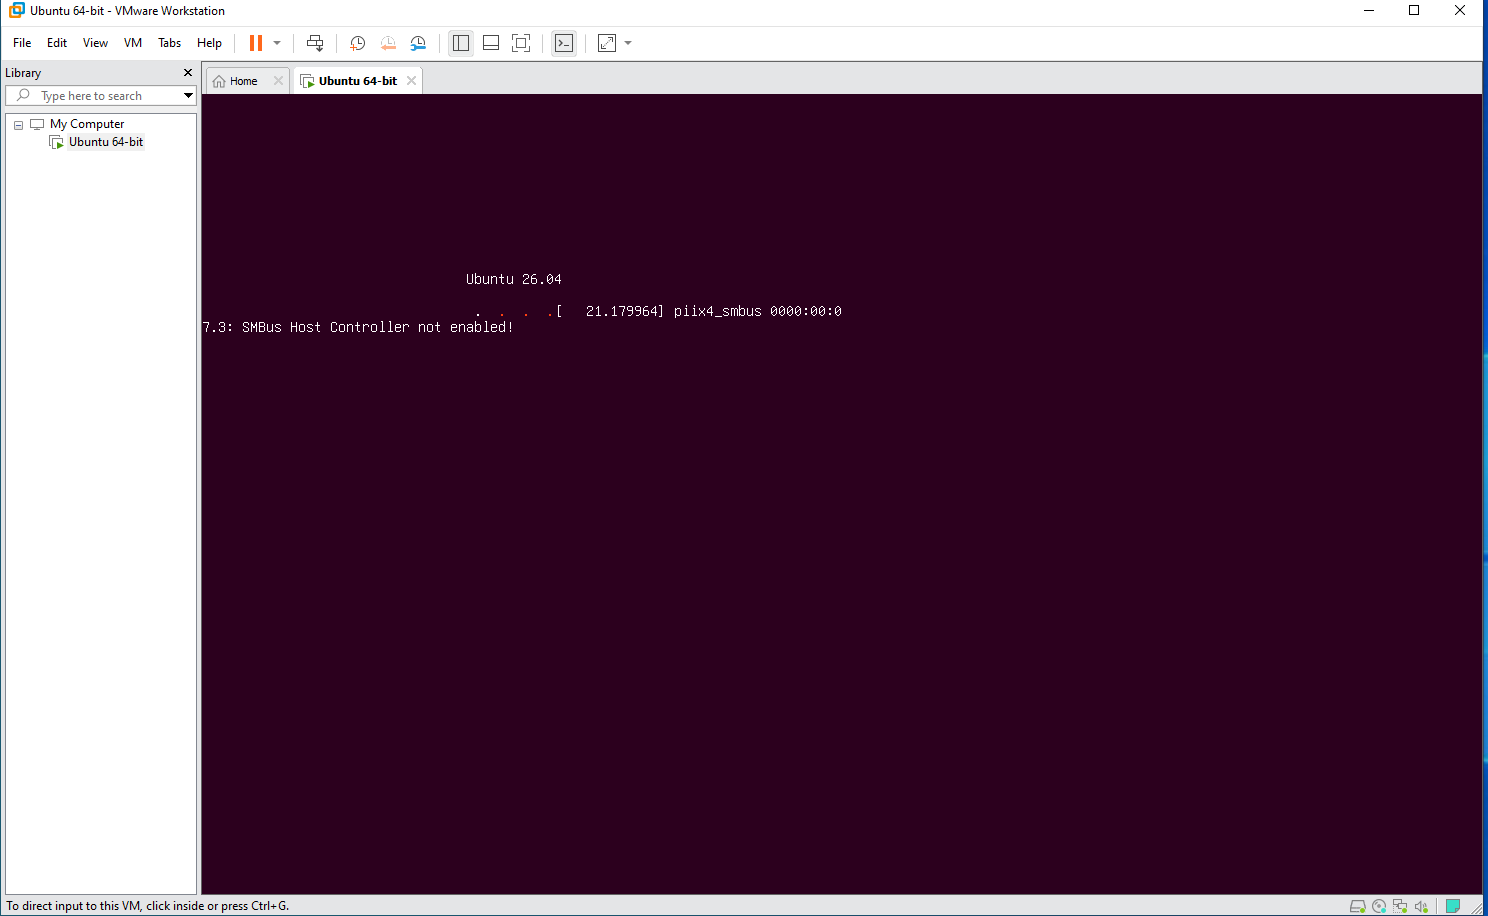
- If you get the below screen, just wait a few minutes it should go away by itself, it is a harmless warning due to ubuntu dectecting a virtual hardware controller that isnt fully enabled.
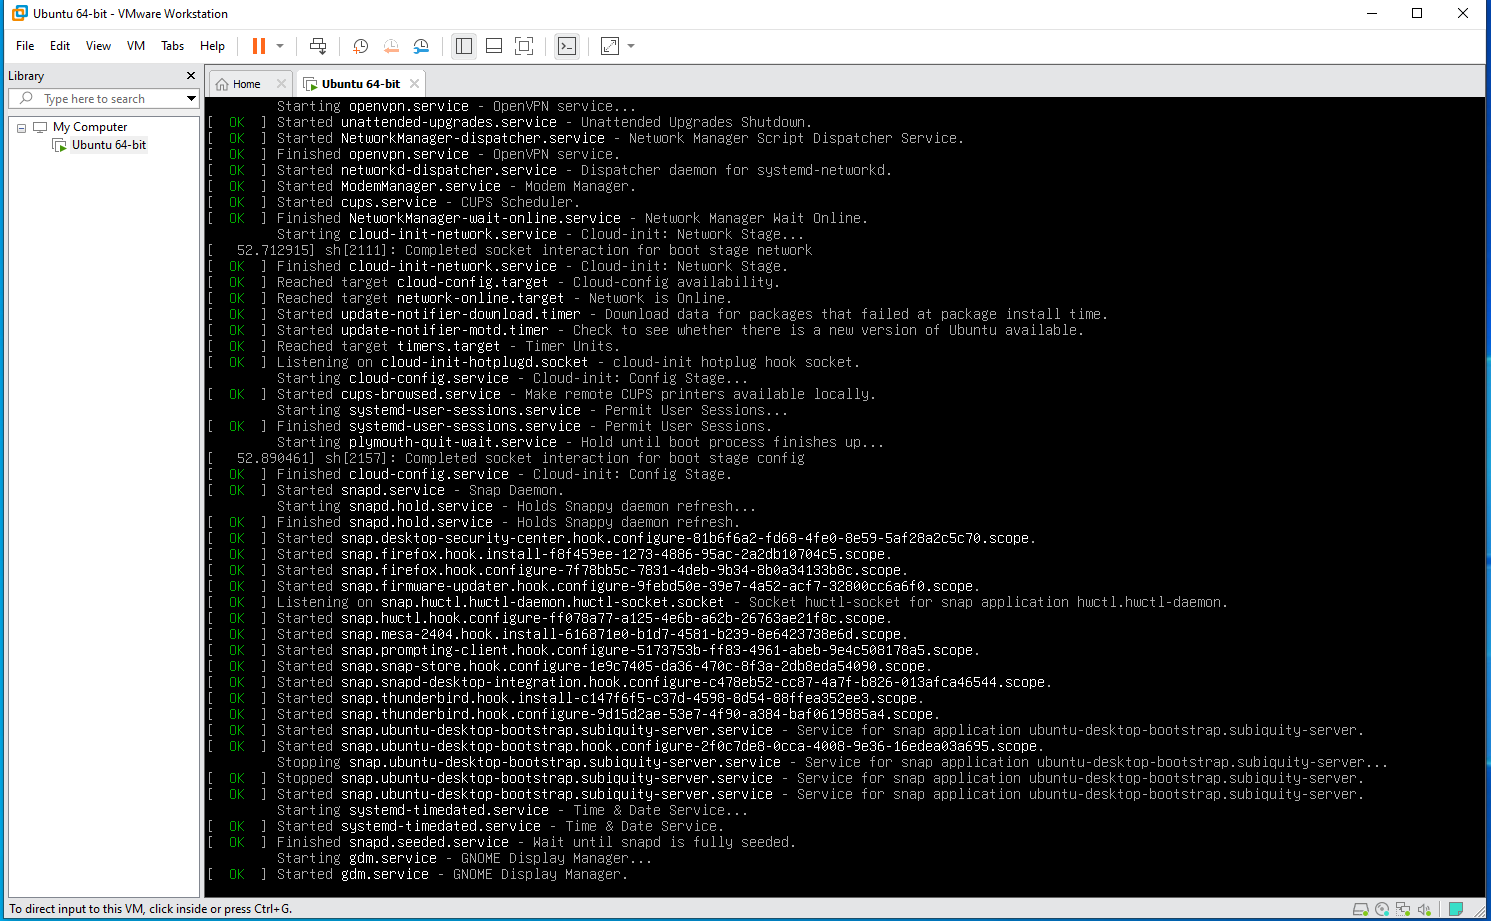
- The below screen is just ubuntu doing its installs of its prerequisites, such as the graphical user interface and much more, let it sit for a few minutes:
- If you get a black screen dont worry. It should eventually just boot into desktop, this can take several minutes:
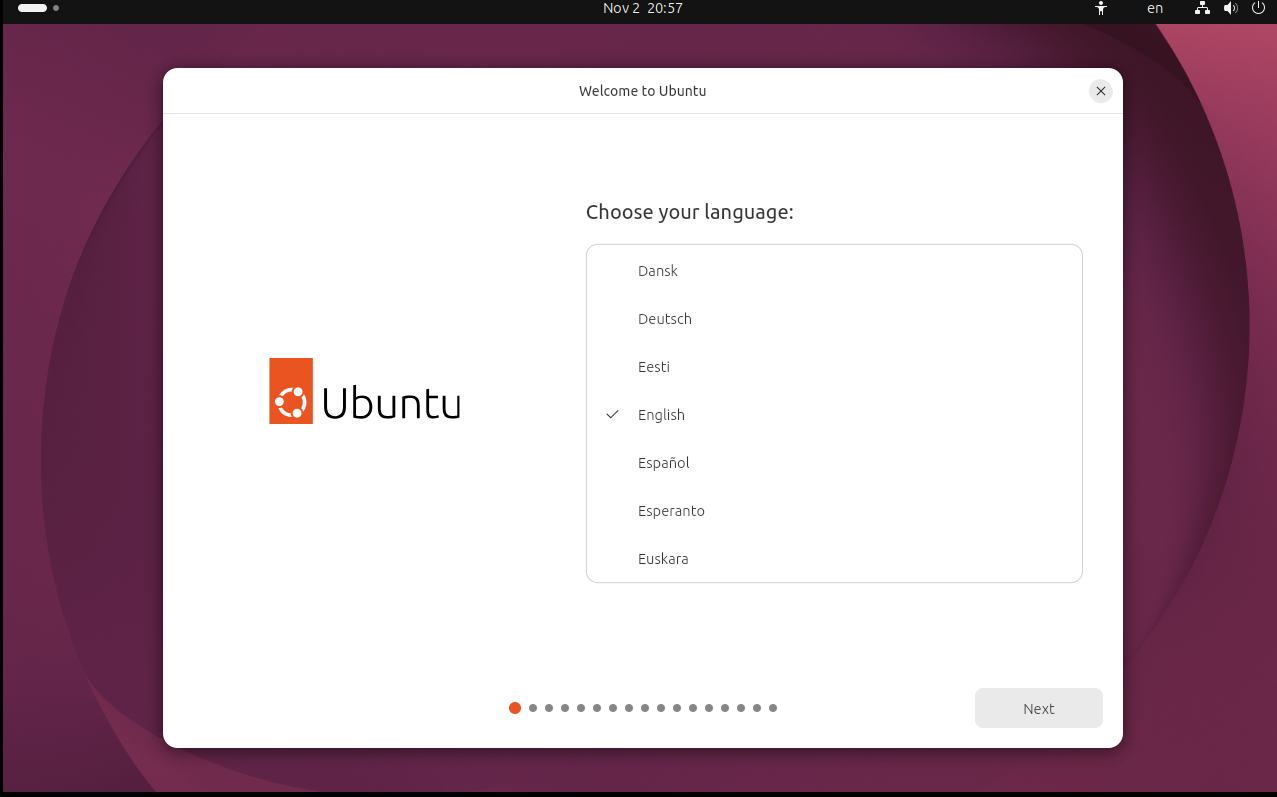
- Select your language, go next,
- either set your accessibility settings that you like or skip by going next,
- set your keyboard language, go next
- set your internet connection (if any)
- select "install ubuntu" if you want this to become a persistent bootable install.
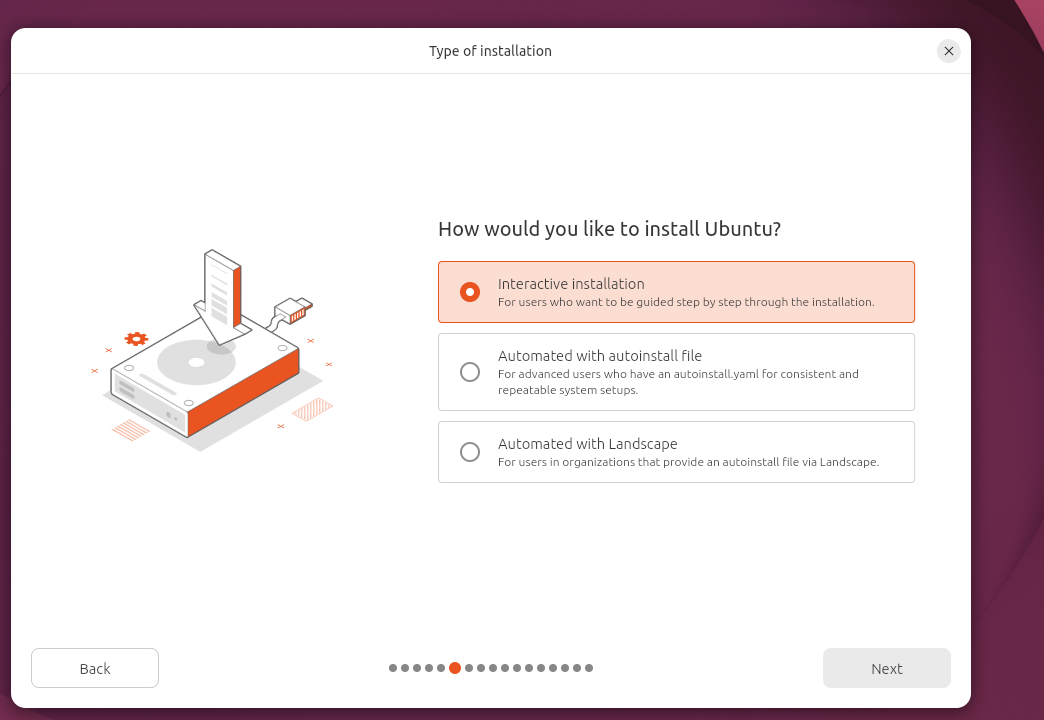
- Selecting "interactive installation" will be a guided install. I recommend to select this:
- Next screen after just set "default" selection. It just gives you the essentials. A standard installation. You can always customise later as you learn.
- Next screen, unless you know for a fact you need something on the lists, skip it.
- Next screen on "how you want to install Ubuntu" select "erase disk and install ubuntu" It will only erase the virtual disk inside the VM.
- Next screen select whether you want encryption. For the purpose of this guide I selected no encryption. But this would essentially allow you to set a encryption and guard your files with a password.
- Fill in details, or username. and password. and decide whether you need password to log in or not then go through your region and finally "install"
- Now you will see it "copying files" this can take a couple minutes also.
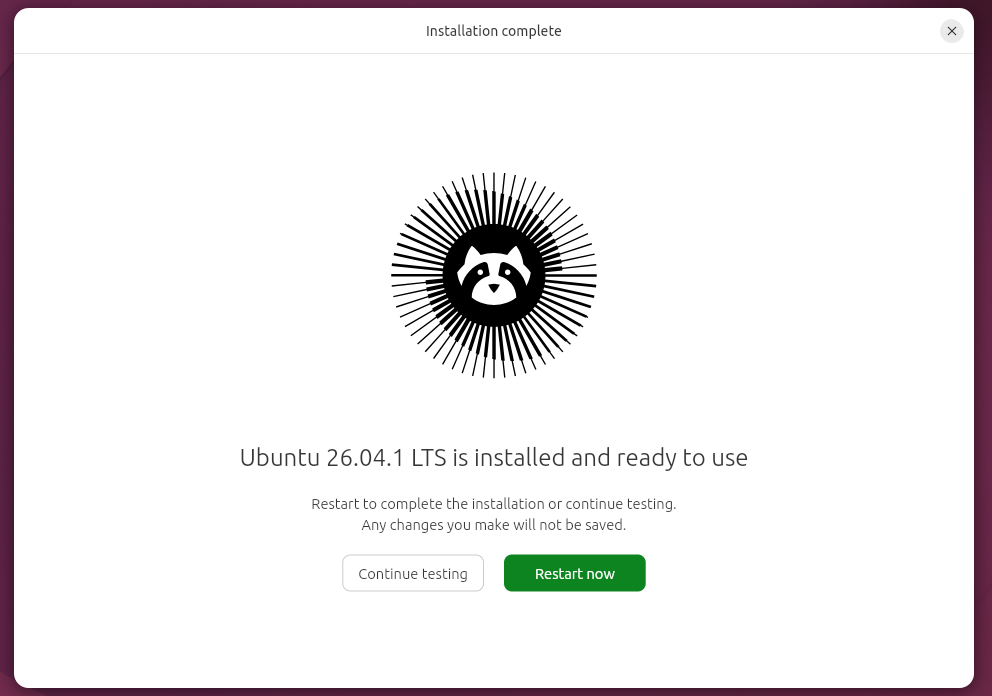
- Once done you should see this screen and you can go ahead and restart to finalise the install:
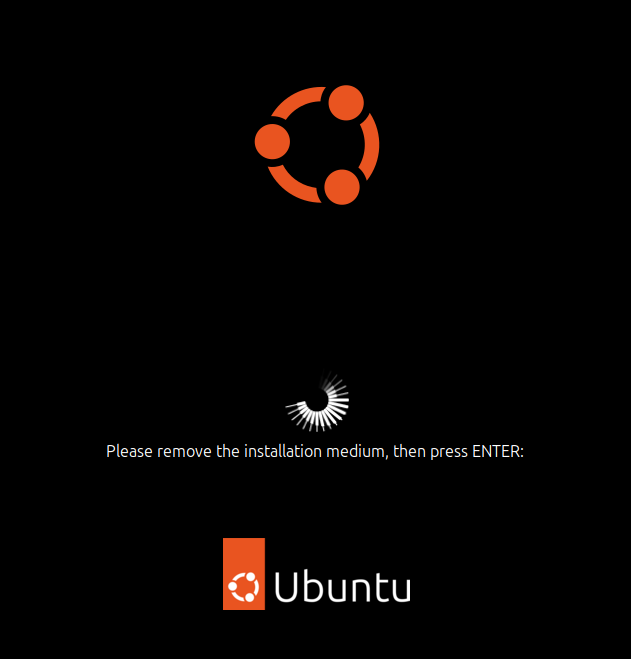
- When you see this screen below, just press enter. The machine should reboot and land you inside the vm.
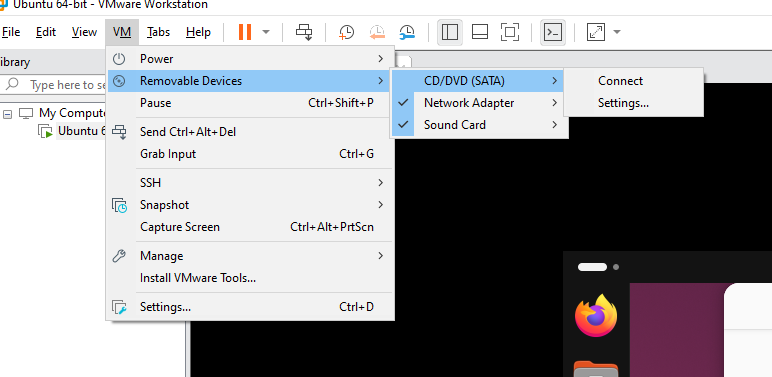
- If it doesnt and just brings you back to above screen, press CTRL+ ALT so cursor is brought back to your machine, select "VM" then "removable devices" then "disconnect" On screenshot below there is no disconnect because VMware did it automatically:
- your ubuntu is now installed: the following screens you can just next / skip or make changes as you please.
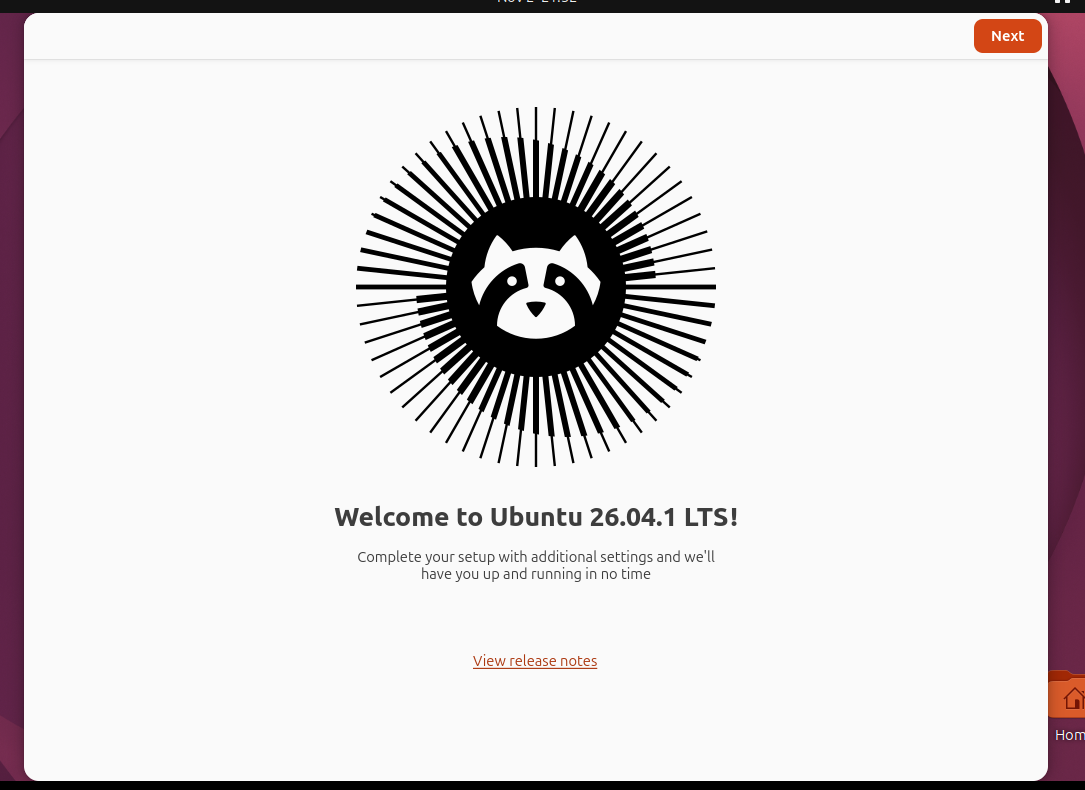
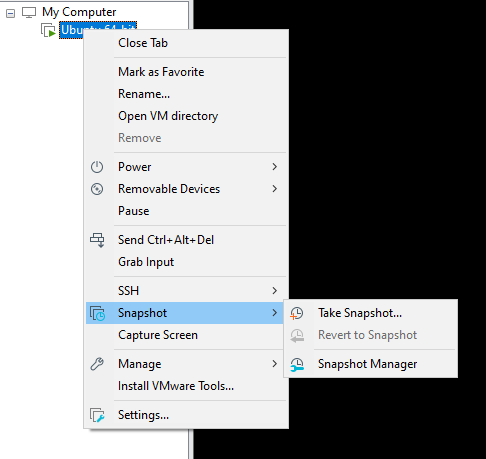
- I do recomend however to create a snapshot of this fresh state in case you in the future need to roll back the VM to a "safe state", you can do this by pressing CTRL+ALT again and right click your VM on the left library, then select "snapshot" then "take a snapshot" or by going into snapshot manager then click "take snapshot" and fill in some details such as name and description:
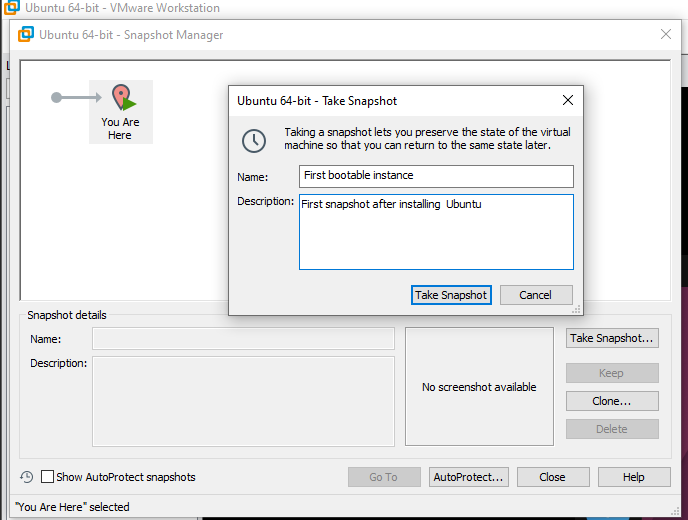
- And to rollback poor decisions you can click on your snapshot and select "go to" Note that doing this will revert any changes you have made on the machine, any downloads you have done, any installs and files you have saved to whatever you had on the very moment this snapshot was taken.
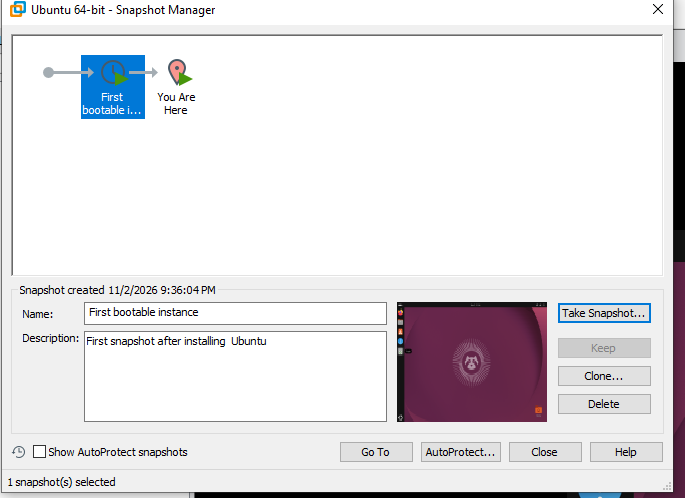 Thats it! You have now successfully installed Ubuntu on a Linux VM